Animating filters and adjustments
There are two ways to animate filters and adjustments.
One is through state transition, where <start_state> differs from <end_state> in terms of the desired filter and adjustment values.
The other is by setting an interaction at the point you want: choose action ‘Change property’, the UI item you wish to animate as ‘Item’, and then choose ‘Property’ → <filter> or <adjustment>. You can specify the desired duration, easing, and delay.
Using variables in animations
You can have a variable affect your animation, as follows. Make sure you first create a variable and that it’s set to get a value at some point before the desired animation. More on variables here.
Then create an interaction on the UI item you wish to animate, such that the action is ‘Change property’, you choose which property and ‘Value type’--> ‘Read from variable’ → <variable_name>. You can specify the desired duration, easing, and delay.
Making UI components draggable
To make a UI component draggable you need to first check the relevant checkbox in the Properties Inspector.
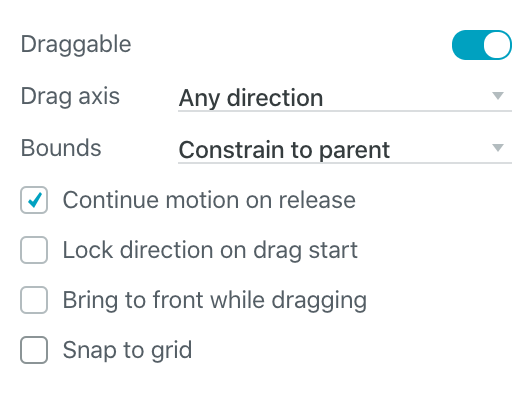
‘Drag axis’ allows you to limit the movement. If you choose “Rotation” and select “Limit rotation” you can specify the angles to limit this rotation.
‘Snap to grid’ allows you to specify the snap angle.
“Bounds” allows you to specify constraints.
‘Continue motion on release’ makes your component move a bit more to the direction you were dragging, even when you‘re not dragging anymore.
‘Lock direction on drag start’ makes your component draggable only towards the direction that you start the dragging movement.
‘Bring to front on drag’ makes the component you drag come to the front of all other components.
‘Snap to grid’ makes your draggable component snap to a grid that you specify (row and column size in pixels). ‘Move only on snap intervals’ makes your component instantly stop when snapping to the grid.
Also see the “Introducing Draggable”, and “Draggable rotate” video.